Thursday, February 20, 2014

A Taste of Ireland: Berry and Baileys Pavlova


While everyone is Irish on St Patricks, we don't necessarily embrace the cuisine of the emerald isle in the most elegant of ways on this festive holiday. In fact, March 17th brings a flurry of fun recipes doused with vivid green food coloring, formed into cheeky shamrock shapes or featuring lucky rainbows. For a change, this year I thought I'd shelve the green dye in favor of a subtler confection featuring flavors indigenous to this wonderful country.
   
Until recently, I had no idea that the surprisingly simple pavlova (after all it was named for the famed Russian ballerina) is such a wildly popular dessert in Ireland. 
A quick online search yielded countless recipes and interpretations of this meringue based delight featuring fruit and cream fillings, including those with a dash of Irish liqueurs. Although more often enjoyed in summer, it is fast becoming a fitting dessert in honor of St. Patrick's Day.
  
Berry & Bailey's Pavlova
This recipe makes a modest sized pavlova serving about 4-5 but can be doubled and as it is very rich, small servings usually suffice. 
 I started with the basic meringue recipe I used in my New Years post, subbing vanilla for the orange flavor and making three large meringues as layers. 
Some Pavlova recipes call for small amounts of flour but the version below does not so it makes a lovely gluten-free option for guests with food sensitivities.
Meringue
2 egg whites
1/8 teaspoon salt
1/8 teaspoon cream of tartar
1/2 cup superfine sugar
1/4 teaspoon vanilla
Filling and garnish
Heavy cream
Irish Cream liqueur to taste (I used baileys)
2-3 cups assorted Berries
Mint leaves
Sugar (I used superfine)
Agave nectar or honey

Preheat oven to 225
Beat egg whites until foamy. 
Sprinkle with salt and cream of tartar, continuing to beat until soft peaks form.
Add sugar and vanilla slowly while beating on high until stiff peaks form
This recipe made three 6 inch circles of meringue. I used an icing tip to draw circles and filled rest in with spoon. If desired a template can be placed under parchment and meringue traced for more perfect shapes. Bake 90 minutes on parchment lined cookie trays. Then let sit in oven (turned off) for 30 minutes with door ajar. Once cool carefully peel from paper.
Weeks of heavy snow meant limited produce at my supermarket so I opted for frozen mixed berries which I sprinkled with some sugar and let thaw. For filling simply whip 1 cup of cream with 1 teaspoon sugar and two teaspoons liqueur or more or less to taste.
Place meringue on serving plate, spread with whipped cream, top with berries and then more whipped cream. Repeat with next two meringues, making as level as possible.
For garnishes, I covered some berries and mint leaves with agave (I'm leery of using raw egg whites some recipes call for) and then sprinkled with sugar for a frosted look.
Any way you slice it, pavlovas are messy once cut into. I used extra whipped cream and mint leaves to try to prettify the dessert plates, drizzling some berry juice as an accent.
Serve with strong coffee or fragrant black tea.


For decor,
 I opted more for a deep green offset with neutrals, whites and cream tones.
 
In honor of the flocks of sheep which dot the Irish landscape, I added some (plastic) wooly friends in a terrarium to the tabletop.
 Since I already use these sheep in Christmas and Spring decor, and I'm a big fan of repurposing, for St. Patrick's, I simply added a printout of a photo I took from a trip to Ireland a few years ago as a background. Some greens and moss rocks from the dollar store complete the mini landscape.
Mist over Kylemore Abbey photo by C.Paul

White roses are an unexpected shift from the usual greenery.
 Ok, A disclaimer: the roses are repurposed from Valentine's (and somehow survived) 
Happily my "good" dishes feature a green accented rim.
 Keepsakes from travels add to the theme.
Yards of oatmeal colored burlap from the craft store serve as a tablecloth

For more Irish inspired ideas, please visit my post 
The Emerald Isle
Ireland in a Jar terrariums, Guiness Truffles, Paper Jewelry


.


Tuesday, February 11, 2014

Candy Bar Makeovers: Sweets for the Sweet

Quick & Easy Candy Bar Makeovers 

Although today chocolate is an intrinsic part of Valentines Day, it is said that it wasn't until the mid 1800's, when artfully packaged by chocolatiers like Richard Cadbury, that this confection took a starring role in this most romantic of days. Since physicians at this time believed chocolate could help ease the woe of lovesick patients, it was the perfect gift for this holiday celebrating l'amour.
Whether you purchase your favorite variety at the corner store or a gourmet confectionery, lovely packaging can add to the fun and enjoyment of this most popular and in my case, highly addictive treat.
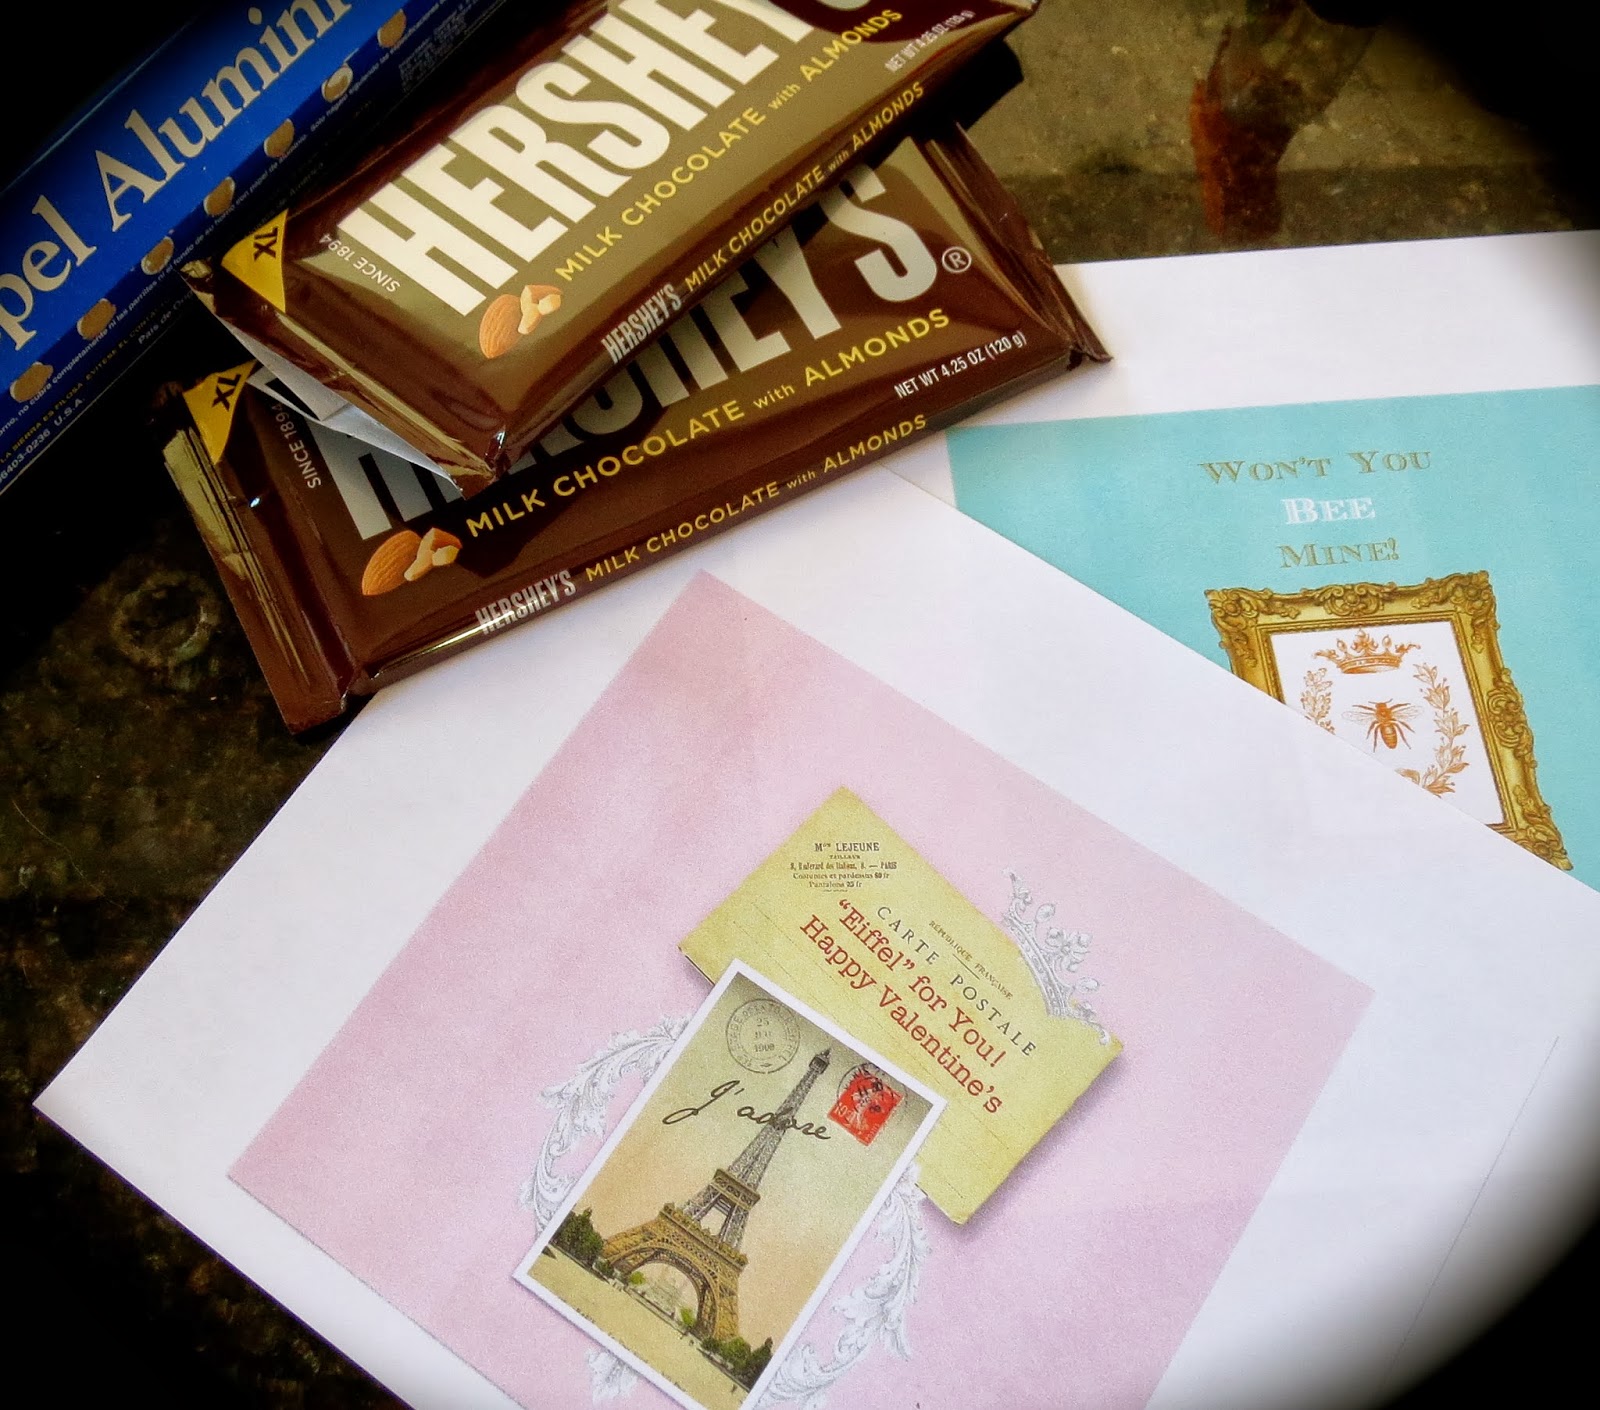
Ironically, I've created countless candy bar covers as favors for parties and showers but never for Valentine's Day. So I thought, this year I'd add a personal touch to one of my long time favorite, albeit humble, candy bars.
I got these oversize Hershey bars at my supermarket (3 for $4.00)

Combining free clip art, photos or images from the  the Graphics Fairy (a great resource), I created some wrappers with some cheeky sayings and a touch of romance.
The fun part is tailoring your designs and themes to the recipient or
feel free to use my designs at the end of the post
Since these bars didn't come with a foil liner, I simply rewrapped in aluminum foil, before discreetly taping on new cover.
and Voila…..

Bees are all the Buzz right now  
For literary types, you can't go wrong with Shakespeare
(I have this quote on my kitchen wall)
and of course For Feline Fanciers….
(This one features one of our rescue cats Angel)

If you like, you can printout these designs adjusting the size to fit your candy bar.


Wishing Everyone a Sweet

Valentine's Day!


Friday, January 24, 2014

A Jane Austen -"Grow your Blog" Tea Party

There seems few better means of escaping the cold grey days of January than with good books, good friends and steaming cups of tea, so when the delightful blogger Vicki of Two Bags Full announced she would be hosting her second annual Grow Your Blog Party this month, (a fabulous way for bloggers and readers to meet and mingle), I immediately thought a tea party post with a literary twist would be fitting for celebrating this wonderful, if only virtual, gathering of creatives. 
 Coincidentally, one of my absolute favorite novels was first published on the 28th of January, and although that was over two centuries ago, in 1813, it is still wildly popular to this day.
The much loved Pride and Predjudice addresses very human themes which seem as relevant in modern times as they did in 19th century. The elegant language, vivid characters, witty observations and picturesque settings make this book truly a delight.
So why not celebrate the 101 anniversary of this timeless classic with a tea honoring it's author Jane Austen. Although the idea of a formal afternoon tea party as we know it, precedes Austen's time, we'll fudge the timeline a bit and with some semi-scratch tea treats and a few easy projects, enjoy the romance of the Austen era, if only for a few hours.
Please note, this is more a fanciful celebration of the spirit Austen's time and novels than an authentic regency experience, so please pardon any historical inaccuracies.
Tea Party Invitations
You'll Need
invitation printout large enough to hold tea bag
individually wrapped tea bags
blank cards or folded card stock and envelopes
I've seen this idea for invitations in shops and a while ago created a version for my sister in law's bridal shower tea. For this Austen theme fete I combined elegant vintage tea and frame images from the the Graphics Fairy
First, I simply printed and cut out my image. Then using a small craft knife cut a small slit along the top edge of the teacup following the design. 
I applied glue around just the very edges of the back of the image, avoiding center area, and attached to folded card stock (I chose a lavender shade). I let glue dry and slipped a tea bag into the cup (it is said Jane enjoyed tea from the Twinings Co.)

Menu Ideas
For the menu, any favorite traditional assorted teas, finger sandwiches and sweets are perfect fare. For my tea, I've included "not quite homemade" tea cakes and provided some links to a few other easy tea time recipes
   For wonderful historic regency recipes, visit Jane Austen U.K and for fascinating information about customs and fashions and more, pop over to Jane Austen's World.
Mrs Bennett's Lace Tea Cakes
"No Lace. No lace Mrs Bennett, I beg you"
                  an exasperated Mr. Bennett, Pride and Predjudice
Though frustrated with his wife's constant preoccupation with fashion finery, even Mr. Bennett might not object to a lacy sweet treat.
For the Tea cakes
Lacking for a proper (or for that matter, any) kitchen staff,
I enlisted the help of trusty Sara Lee for this easy treat.
Slice slightly thawed cake into desired shapes with a knife or cookie cutters and brush off extra crumbs. Set on wire rack over wax paper lined pan
Icing glaze
1 cup confectioners sugar
3 teaspoons Corn syrup
3 teaspoons milk
1/4 teaspoon orange extract (or desired flavor)
Blend ingredients together until smooth and glossy. 
Add small amounts of extra corn syrup if icing is too thick. 
Pour over cakes spreading evenly on sides and allow to set. Icing should dry to smooth shiny finish that is firm to the touch (this can take up to 40  minutes)

For the "Lace" Accents
Though there are many elaborate edible lace techniques and supplies sold in baking supply shops, I thought I'd try a quick and simple low cost method using colormist food color spray available at many craft stores or some supermarket baking sections, and some paper doilies.
Simply lay doily gently on iced cake, spray with colormist and carefully remove.


Warning: Colormist can stain skin and fabrics, so take care to avoid mishaps.
(I had purple hands for a good 24 hours)

For more PennyWise tea time recipes try
left to right
Earl Grey shortbread spoon cookies 
with lemon curd from my Tea at Downton Abbey Post
 Syllabub 
A more authentic historic recipe my May Day post
Cucumber baskets and Scones 
from Teatime on the Bunny Trail

"Let other pens dwell on guilt and misery"
                  Jane Austen on her writing

Fan Favors
In Austens time, fans were not merely portable substitutes for air conditioning but were wielded as important yet subtle ways to express oneself and send messages to potential suitors. With that in mind it seemed fans would make fitting favors and though these are easy DIY paper varieties rather than fine antique silk and lace, they make fun keepsakes. Using scrapbook paper, humble clothes pins and craft accessories, these more contemporary versions feature Austen quotes and characters.
this charming image shows young ladies mastering the movements of this must-have accessory from a delightful collection of regency and vintage images at the blog bumble button

I found an adorable kids paper fan craft project at mrprintable and though it's geared toward little ones, I adapted it for this easy more grown up DIY 
You'll Need
Decorative paper & printouts of regency images
Wooden clothespins (the type used for dolls)
Paint in desired colors
Assorted Ribbons, Accessories & faux flowers
I received a delightful Pride and predjudice paper doll book by Dover publications from my aunt, and made copies of the characters on the cover (not wanting to cut into it). 
My craft store carried this perfect scrapbook paper book from DCWV called "Dear Jane" filled with quotes and beautiful patterns. 
To begin, I painted the clothes pins with craft paint and let dry thoroughly. 
I then created a few collages of images and words and copied them onto standard sized copy paper. The lighter paper provides less bulk and makes folding easier. (Each fan requires 2 sheets.)
Once happy with your designs simply glue 2 sheets together (at the shorter width) and channel your kindergarten skills by folding paper accordion style. 
I then trimmed the white borders off of the sides and while still folded cut a scallop edge for interest.
Insert folded paper into slit in clothes pin, trimming excess paper to fit if necessary and wrapping with clear tape.
*I slipped an oversize toothpick in the clothespin behind paper to keep it from being too floppy 
For the fun part, Camouflage tape by wrapping ribbon around top of clothespin and add coordinating flower or button accent.
Then wave coyly and work your magic!

Tea Time Accents
Second hand books tied with ribbon, make "novel" props
Tea Chest
Jane experts claim she had the honor of holding the key to the family's tea caddy (the leaves were far too precious to be under the watch of household servants ) For my tea, I reused a humble thrifted jewelry box which I had repurposed into a tea caddy for my Downton Abbey post.          
Rolled script spruces up faux floral and ivy


"There's nothing like staying home for real comfort"
                               Jane Austen, Emma


Thank you so much for stopping by and please pop over to visit more (than 500!) blogs from around the world participating in this wonderful party!


a little Austen humor
from somee cards


Centuries later, he's still a heartbreaker - tote bag from-cafepress.uk