Friday, May 24, 2013

Creature Comforts


Whenever I return from any shopping excursion, I can count on my cat Chloe to immediately hop into shopping bags, commandeer  boxes, and investigate our newest purchases; her latest fascination being one of those repurposed boxes used in place of shopping bags at Costco and big box stores.
As much as I enjoy having "eclectic" decor, a cardboard dish soap box just wasn't cutting it in our living room and as our beloved feline showed no sign of relinquishing her new favorite nap time spot, we popped a blanket in it for the time being and figured a remodel was our best bet.


The smallest feline is a masterpiece
          Leonardo da Vinci

I used 18th century garden follies as inspiration (I know, it's a stretch)
These delightfully detailed renderings are from architecturalwatercolors.com

Feline Folly


I used:
the aforementioned sturdy cardboard box
decorative wood accent
joint compound 
assorted paint
Flexible moulding
old Christmas ornament for finial
cat figurine, mini artwork and accessories
scrap faux fur and gold trim
assorted spray paint
some of the supplies
I first cut an opening below the handles to enlarge the  "windows"
I then coated the box with joint compound to create a stucco-like texture and let dry thoroughly
 (the instructions said 24 hours). Once dry I spritzed the box lightly with some left over faux stone spray outside and a quick coat of white on the interior.
Chance of rain brought my painting projects into the makeshift studio/garage. I sprayed the moulding and finial and a plastic cup with hammered copper and gold 
I cut the moulding in half with a small hand saw (no need for perfection- the ends won't be visible, and inserted them corner to corner to create an arched roof, discreetly attached in place with clear shipping tape. 
Using hot glue, I attached a spruced up plastic cup and holiday ornament finial. I also spray painted part of an old dimensional a wall paper border the same coppery color and ran it around the top with glue. Finally, I popped the wood accent over the entryway.
 The Dollar Store Cat was cute but got a quick spray of white and stone paint and a small flower pot pedestal for a more garden statue finish. I then added a scrap of a faux $2 fur coat from a thrift store's discount room and a framed mini color copy of one of my cat paintings.


I glued on white drinking straws as window panes. I accessorized for curb appeal and waited to see if the "client" was pleased.
more inspiration:
Amazing luxury pet beds from $145-$5,500 (yes that's thousand)
IT'S A PET PARTY
Love Pets of all kinds?
Pop over to Annies 13th Birthday and Pet Party  to see the most adorable four footed guest list at 


Teatime with Kitty


Created using images from Graphics Fairy
While there are dozens of doggie treat recipes for fido, I struggled to find as many homemade options for his feline friends. Luckily I stumbled onto this site called simplypets.com featuring a menu of cat pleasing treats and even catnip tea! Thus the Teatime with Kitty idea was born.
Mousy Crackers are a hit
The best of both worlds: a tuna flavored "mouse" cookie. Using the Cat Cracker recipe, I molded the dough into rough mice shapes and added treats for ears before baking. While admittedly not the finest looking rodent, the treats were met with some approval from our furry friends. I also cut much smaller more snackable size treats from the same recipe.
Always check with your vet to be sure homemade treats are ok for your furry friend- 
some may have food sensitivities

Being naturally quite shy, Angel took her catnip tea under the dining room table


*PLEASE NOTE:*
I left the treats, covered on the kitchen counter unattended, and when my husband arrived home, accustomed to my unusual culinary creations being left about, he unknowingly "sampled" one. Apparently they are not as palatable to humans. 


Fun Cat Fact:

Many sources, including thepetwiki.com confirm that not only was Winston Churchill a fan of cats, but that he would on occasion have his feline friend sit in on cabinet meetings and at times at the dining table.


PennyWise Tips


If a pampered Pooch is also on your guest list you can whip up these easy Dog treats in a Jar from our holiday Not-a Creature-was-Stirring post- just click link for details and instructions.


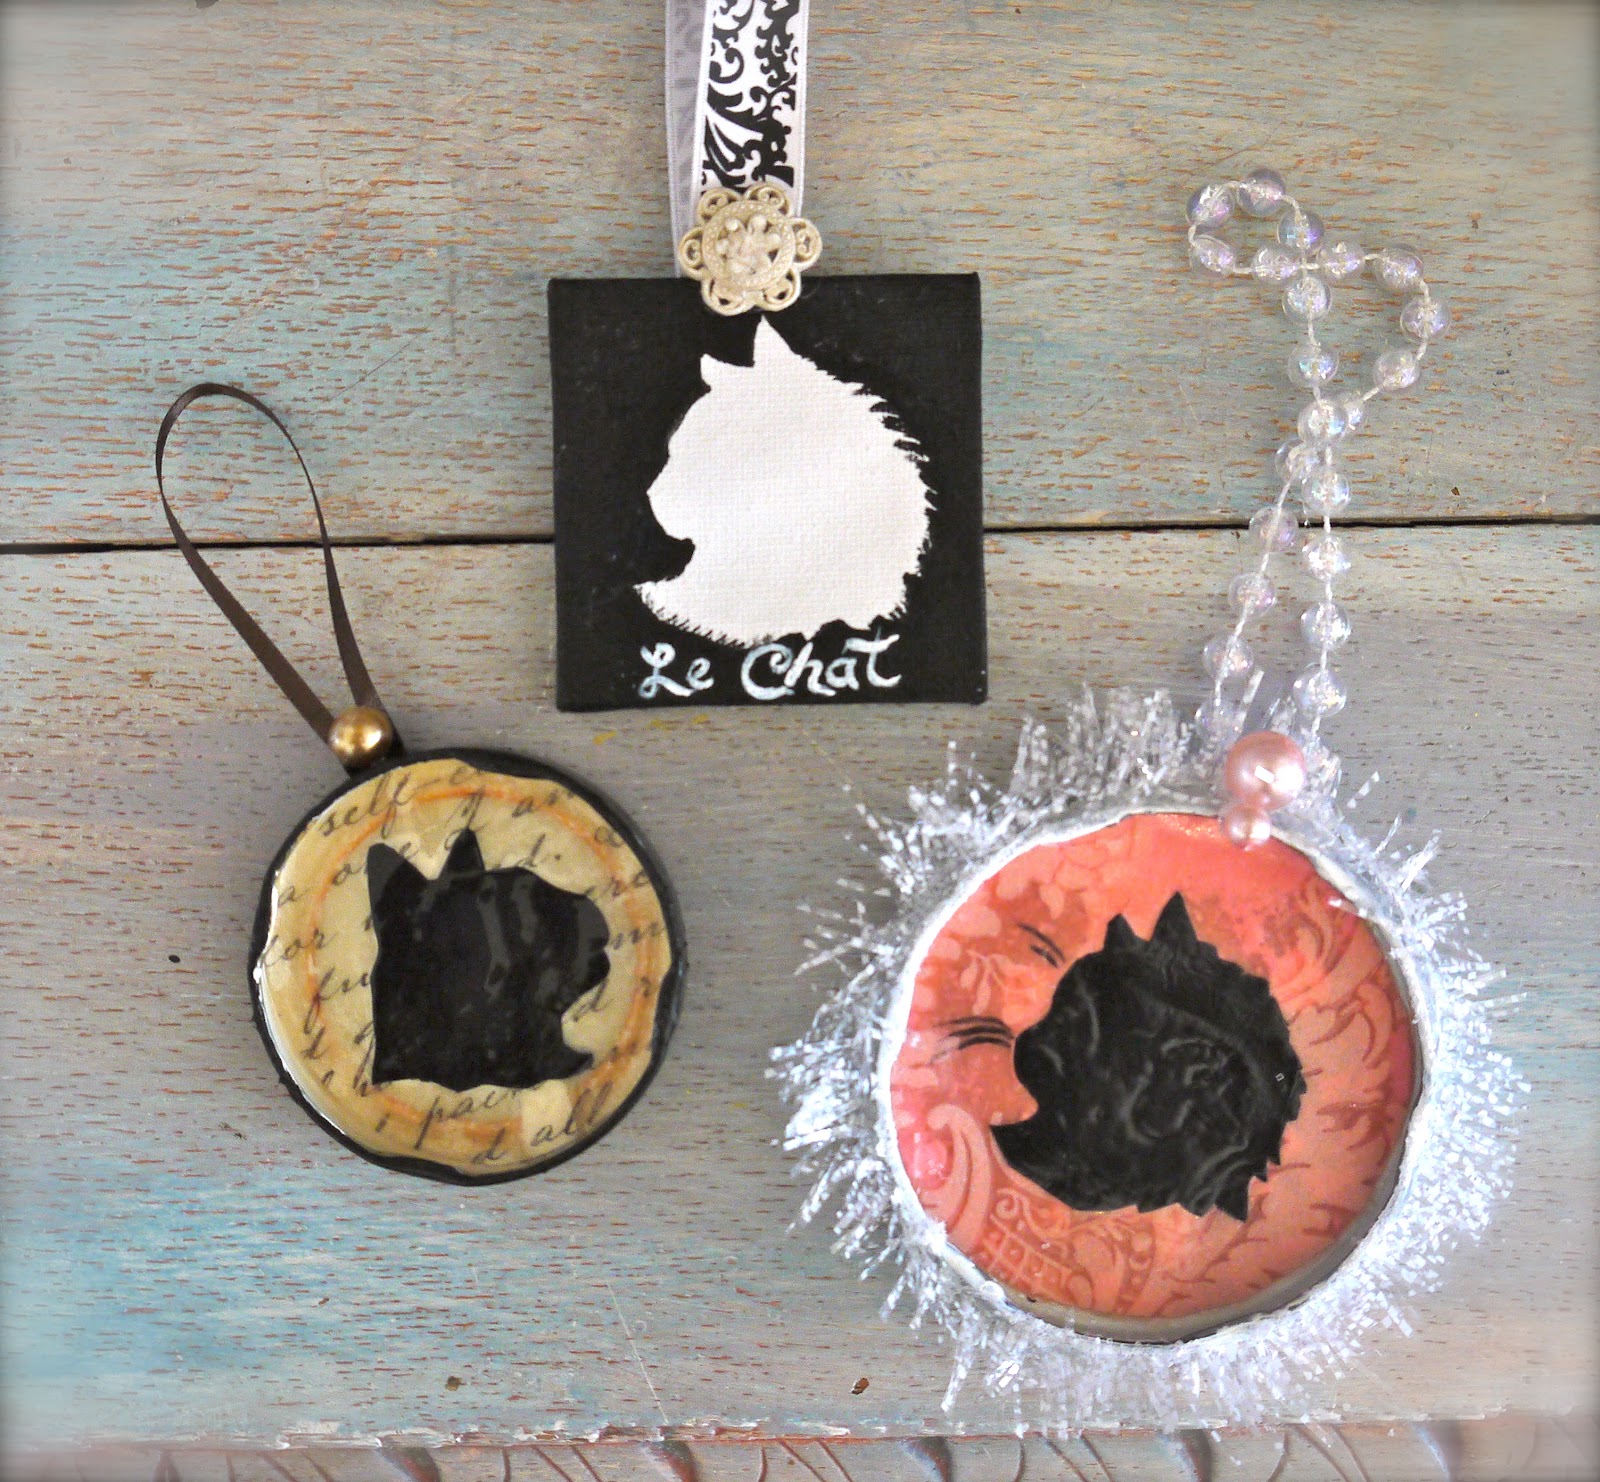
Or perhaps you might like to celebrate your beloved pet with an easy Pet Sihouette made with scrapbook paper on mini canvases or old jar lids.


I'll be linking up to Pink Saturday and more fun parties. Check out our "You're Invited Page


Thursday, May 9, 2013

Cheers! Pink Champagne Cake for Mother's Day

Traditional flavored cakes might work for most occasions but why not celebrate Mom's special day with a rosy hued confection featuring something a bit more spirited. Bubbly pink champagne, creamy frosting and sweet light cake all come together to create this heavenly old fashioned treat.


There is much controversy in the culinary world over what constitutes an authentic Pink Champagne cake and dozens of recipes online. I found this easy semi-scratch recipe using a cake mix base for those of us with less advanced baking skills: 

image from Graphics Fairy

 I feel less guilty using an all natural cake mix despite adding food coloring
A note to purists, I subbed budget friendly pink sparkling wine for the champagne


 In the spirit of recycling I borrowed some leftover pink hued doves, (dyed in food coloring)
pink damask paper and gold letters used in my Love is in the Air Valentine Post 
Since my Mother loves birds these worked well and were perfect with the color scheme, but butterflies or flowers would be nice accents as well.

Add some sparkle with sugar pink pearls and white sprinkles
and a "Mum" ribbon banner on bamboo skewers
Simple and quick for those with limited confectionery skills


 Simple swirls of frosting


Serve with Tea in an elegant (yard sale) cup

Mothers hold their children's hands for a short while,

 but their hearts forever. 

 ~Author Unknown


PennyWise Tips

Think Pink: Accent your table with pink flowers, ribbons, a vintage birdcage and of course a bottle of bubbly. This is a fun cake for milestone birthdays and other celebrations too

You might want to include a non-alcoholic dessert for any younger guests or those avoiding alcohol. 

This is also a wonderful day to celebrate any woman (teacher, coach, mentor, friend) who has been like a Mother or a "Mom in spirit" to you.

check out this weeks fun Linky Parties our you're invited page


Wednesday, May 8, 2013

Mother's Day Flower Pot Pens


Mother, you've given me two things
One is roots
The other's wings
anonymous

For many, handcrafted gifts are always the most precious. I know many mothers and grandmothers who still treasure their clumps of salt dough with tiny hand prints and painted pasta bead necklaces, not to mention their refrigerator gallery of finger paint artwork. With a bit of grown-up help, this simple flower pen and journal craft is an easy and fun project for kids to create and makes a unique and budget friendly gift.
 I made these pens years ago for a children's art and writing group and they thoroughly enjoyed creating them. For this post I thought I'd make several pens as a "bouquet", pop them in a flower pot and add a garden themed mini journal. Perfect for jotting down garden daydreams and plans.

You'll Need
Inexpensive pens
Faux flowers
Green embroidery floss 
  (mine was 39 cents and each yeilded two pens but this may vary)
Hot glue gun
Small flower pot or decorative planter
Small piece of styrofoam (or cut to fit from recycled packaging)
 *note: avoid green floral foam-it crumbles and sticks to pen points
Moss or filler if desired

Journal (Target $1 section)
Image of your choice or our printable
Modgepodge - or white glue thinned with water
Ribbon or trim

 Most supplies can be found at dollar or craft stores
 Put dot of hot glue near tip of pen and (with tweezers if desired  to avoid burnt fingers) attach end of embroidery floss and let cool slightly (adults do this part). Once secure begin winding floss neatly around pen, sliding strands up and condensing together every so often until pen is mostly covered and glue end to secure.
Smooth any loose ends 
  Leaves can be added in clusters part way through or attached with hot glue afterward.
Remove flower from stem and trim back so it is as flat as possible.
 Have adult hot glue flower to end of pen. 
This one is simple with no leaves.
If adding them, watch the placement of leaves to assure the pen will be comfortable to write with. 
Repeat using different flowers or add a butterfly.
 Varied colors of green floss help make a colorful bouquet.
Insert styrofoam in container and add moss if desired. Holes can be made first with undecorated pens to protect floss on finished ones from being damaged. Then"plant" pens carefully and add greeting or tag if you please.
For journal Modgepodge image or decorative paper onto front and let dry. Add ribbon bookmark or trim as desired.
altered vintage watering can and wreath images from  the Graphics fairy

PennyWise Tips

Not just for Mother's day, this craft can easily be adapted to different themes

Wrap in twine and top with a small shell or starfish and pop in mini beach pail

For the boys- wrap in cord of his favorite team's colors and top with a small ball or sports charm and place in a sports mug

Sunday, May 5, 2013

We've got a winner!


I'd like to thank everyone who participated in our  Ramsign giveaway!

(cue drum roll)
And the winner  is.......

Congratulations 
Revi!
You can see her amazing original artwork and vintage treasures on her delightful and inspired blog!